Solaris/x86 10 03/05 on the old Toshiba Libretto 110 CT

By , July 10, 2006 12:20

As promised earlier, here’s the HowTo and some images of
Solaris/x86 10 03/05 running on my old Toshiba Libretto 110CT.
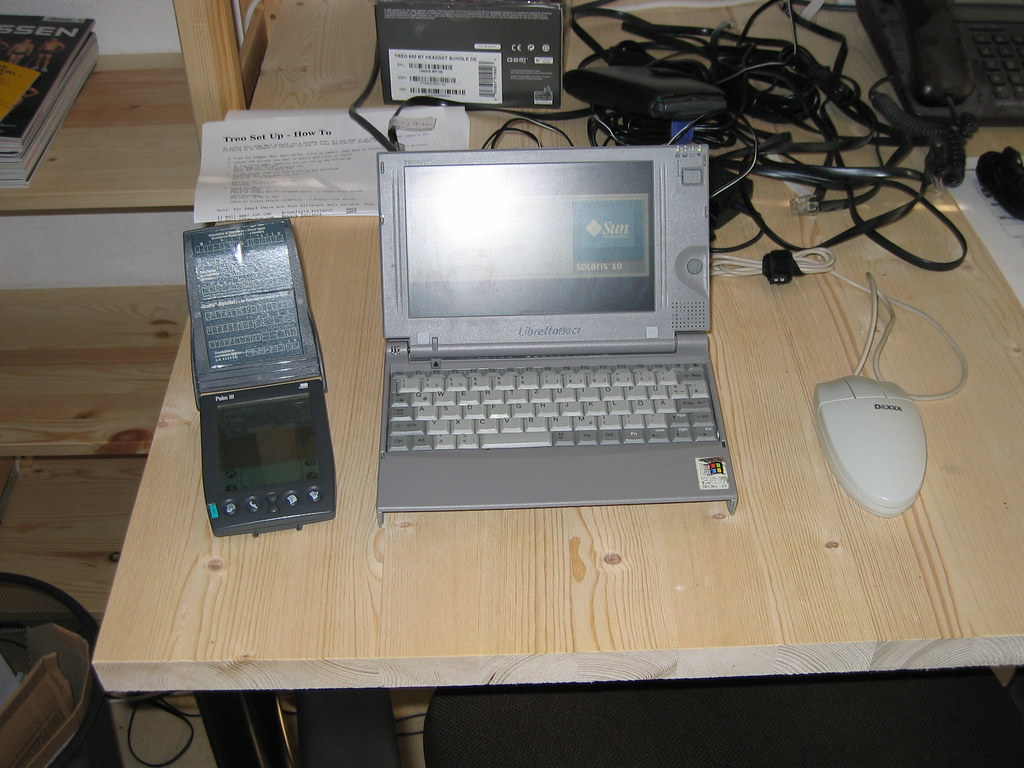


The first thing, you need to be aware of, is the small (and somewhat limited) hardware. It has only (and this is the max!) 64MB of main memory, it has a 233 MHz Pentium CPU. It does have a standard laptop harddisk (which I upgraded long ago to 19GB, to have more storage space, and to be able to run multiple OSes (8GB for Win2K, 5GB for Solaris and 5GB for Linux (which I never really used!)). It does NOT have buildin network, nor buildin modem. Instead it has 2 PCMCIA slots. Tt does have a serial and a parallel port. It does NOT have a floppy, nor a CD drive (these are connected via a proprietary PCMCIA connector). The internal screen is 800×480 pixels. It is connected to an NeoMagic graphics adapter. So, you can imagine, that it is a little bit tricky to get it to install and accept Solaris/x86 10 03/05.

With some ideas and tips from Casper Dik and his description of his installation on a small Lifebook I was ready to go.

I did, just as Casper proposed and so, I just made (OK, some small modifications were needed (and are still needed!), so do not take this literally!):

cd /cdrom/cdrom0/Solaris10/Tools
cp d1_image d1_image.pe3
lofiadm -a `pwd`/d1_image.pe3
mount -F pcfs /dev/lofi/X /mnt
cd /mnt
cd solaris/drivers/isa.125
cp …/pe3.bef .
cd ../../devicedb
cat ‘PNP8214 pe net all pe3.bef “Xircom Pocket Ethernet parallel port card”‘ >> master
cd
umount /mnt
lofiadm -d /dev/lofi/X

And then copy the image to the floppy (aka “dd if=d1_image.pe3 of=/vol/rdsk/noname”, or similar)

Then you need to create an installserver, because you need to add stuff to the Solaris 10:

cd /cdrom/cdrom0/Solaris10/Tools
./setup_install_server /path/to/your/place

When that is finished, do:

cd /path/to/your/place/Solaris_10/Tools/Boot/boot/solaris/drivers/isa.125
cp …/pe3.bef .
cd ../../devicedb
cat ‘PNP8214 pe net all pe3.bef “Xircom Pocket Ethernet parallel port card”‘ >> master
cd ../../../kernel/drv/
cp …/pe.conf .
cp …/pe .
chmod 644 pe.conf
chgrp sys pe.conf
chmod 755 pe
chgrp sys pe
cd ../misc
cp …/GLD .
chmod 755 GLD
chgrp sys GLD

Then do the

cat “XX:XX:XX:XX:XX:XX” >> /etc/ethers
cat “YYY.YYY.YYY.YYY HOSTNAME” >> /etc/hosts

./add_install_client -i YYY.YYY.YYY.YYY HOSTNAME i86pc

After that, boot from floppy… ;-)

That’s it! It really is that simple!

And be sure: Don’t reboot automatically, because you need to add some stuff before reboot!

Aka:

cd /cdrom/Solaris_10/Tools/Boot/kernel/drv
cp pe /a/kernel/drv
cp pe.conf /a/kernel/drv
cd ../misc
cp GLD /a/kernel/misc
cd ../../boot/solaris/devicedb
tail -1 master > muell
cat muell >> /a/boot/solaris/devicedb/master
rm muell
cd ..
cd drivers/isa.125
cp pe3.bef /a/boot/solaris/drivers/isa.125
cd /a/kernel/drv
chgrp sys pe
chgrp sys pe.conf
cd ../misc
chgrp sys GLD
cd ../../boot/solaris/drivers/isa.125
chgrp sys pe3.bef
chmod 644 pe3.bef
add_drv -b /a pe

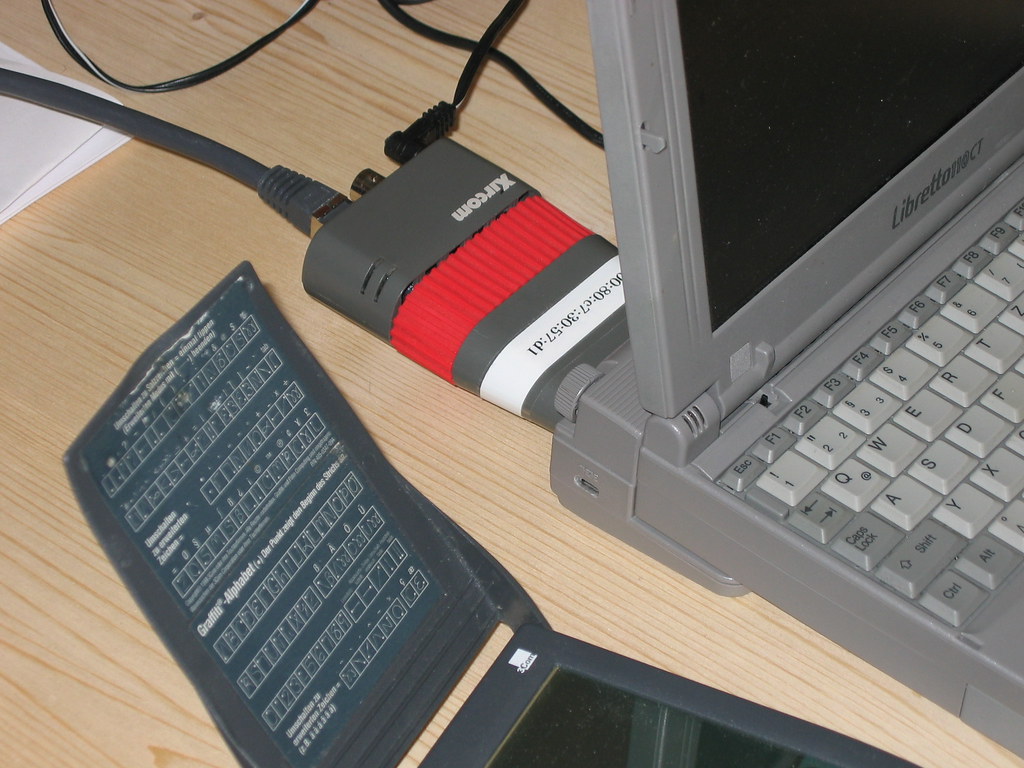
So, here’s an image of the PE3:


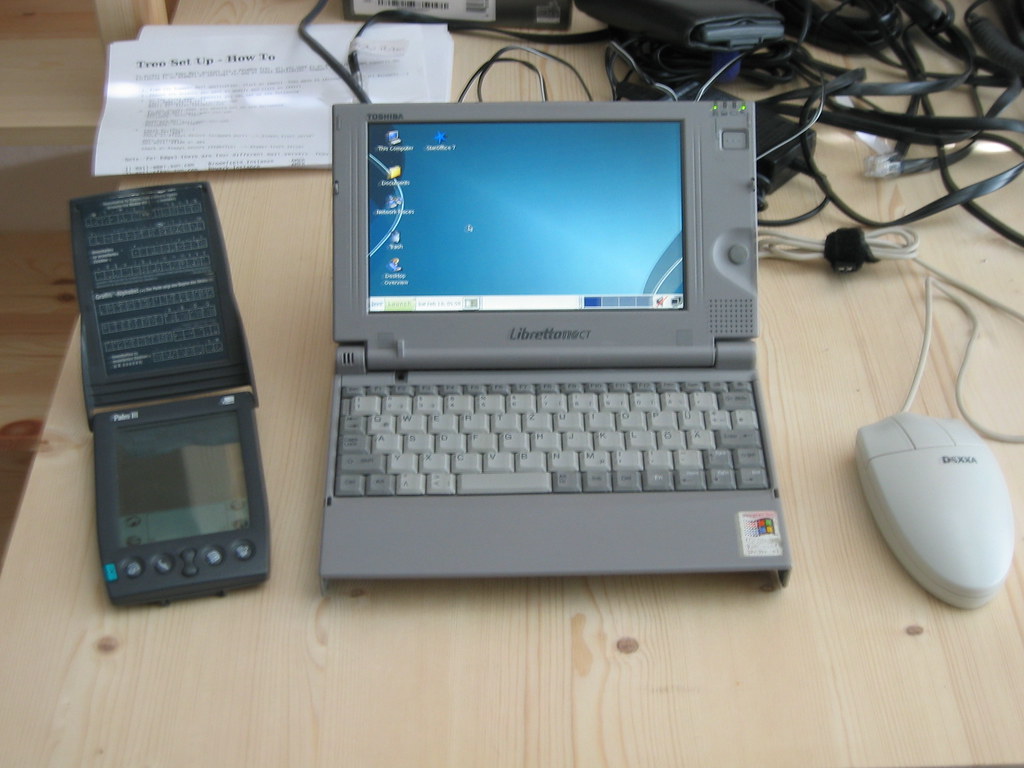
And here’s the session after the login:


And finally, here are the relevant files, in a tar.gz-file: pe-s10.tar.gz

Gabriel Garcia Marquez: Vivir para contarla

By , July 10, 2006 10:08

Last night I finished the reading of Gabriel García Márquez‘ book: Vivir para contarla (I did read the german translation… ;-)). It’s so to say a part of his autobiography. It was 2:15 am, when I put it aside… ;-)

Gabo (or Gabito), as his friends call him, tells us a small piece of his life (so around his being 15 to nearly 30), his growing up in Colombia in the 40th and 50th of the last century. He does that with the same speech and language as his novels, which did earn him the Nobel Prize. Therefore this also makes a whole lot of fun to read it.

Not much more to say: Just read it, you will enjoy it!

Denon AVR 2807

By , July 4, 2006 11:31

Last week I bought my second AV Receiver, a Denon AVR 2807 to replace my 9-year old Onkyo TX-SV 535.

Why?

The old Onkyo didn’t have a 5.1 or 7.1 input, and therefore listening to SACDs or multi-channel DVD (video and/or audio) was impossible… ;-(

So, why the Denon?

Simply, because of the applause it received in the media. And because it has no fans, and is therefore real quiet! And because I already have a multi-norm DVD player from Denon, the DVD 2910, which I like.

So, what’s my impression?

I like it!

In more detail: The options are phenomenal, the technical finesse is overwhelming. And at a price of 820,- EUR, there’s nothing to complain about. Still, there are a couple of points, I’d like to make:

  • The manual does contain all relevant information, but you need to know, what to look for. There is no real index nor glossary! And with all the features, that should be required. But, bad manuals for consumer electronics are a given today… ;-(
  • In Europe we have many video-connections using SCART (a 20-pin connector, with a grounding shield). The problem with that is, that it either transfers analog RGB, or composite video in both directions. The s-video nor the component-video (YUV) can be send bi-directional, as this is a limitation of the norm of SCART. As the Denon does not have a RGB input, this restriction reduces the video-quality.
  • And, as this is my first real video and audio receiver, I had to recable my other electronics. So, be prepared to use much time in doing it properly.
  • My old Onkyo did have a “start by switching on the TV” input, which I found real useful, and do miss now.

In order to connect my TV I needed to use it’s SCART connector 1 on the back, and soldered a connection using SCART pins 1, 3, 4 (Audio out), 17, 19, 20 (Video in and out) and pin 8, which I connected to Denon’s trigger 1 out (so that the TV is switched on, when I select a video input on the Denon). Video in on the TV is connected to the monitor out of the Denon, so that I can use the On Screen Display functionalities of the Denon.

In order to connect my VCR I bought a SCART – Cinch converter with 6 cinch plugs, using Audio in and out, as well as video in and out. I did NOT connect the audio plugs from that converter, but used the cinch in/out plugs at the back of the VCR.

The classical tape didn’t offer any problems, just connected the 4 cinch cables.

Also the old phono (Moving Magnet) didn’t offer surprises, just connected the 2 cinch plus the grounding cable.

The DVD I did connect via all possible connections, using digital via HDMI, digital via coax and fibre (copper and optical) (the AVR 2807 doesn’t have a DVI), I also connected the analog 2 channel and 5.1 channel (for use with SACD, as SACD is not transported digitally!), and connected it’s SCART to the second SCART on the TV backside (for best video signal transfer! But: I cut pin 8, so that turning on the DVD does not switch the TV). So now, there are really many cables between the two Denons… ;-)

And, after having connected all 6 speakers (I do not yet have surround back!), I was ready to go…

Using the automatic speaker setup was easy, the only thing, that surprised me, was the fact, that it insists on all speakers (front, center, surround) being connected wrongly (which you can ignore, by using “skip”). The positive of this is, it measures the distance and the volume real good.

After that I needed to study the manual in order to learn, how to define, which surround option to use for which input (Dolby Surround ProLogic II cinema for TV and VCR, Dolby Surround ProLogic II music for the tuner).

Be prepared, that using HDMI does not work for DTS, I needed to switch to digital (coax or optical, both work).

So, still much to play around with (there are still four amps left, 2 for the surround back, and 2 for a zone 2!), but, having listened to a couple of DTS DVDs made me real happy with my decision… ;-)

Highly recommended!

Panorama Theme by Themocracy